Lately I’ve been playing around with how light my aids can be with Wiley. Eventually, I’d like to be riding Wiley at liberty…no bridle, no saddle… only minimal aids that “suggest” what he should do. But since he isn’t even old enough to ride, I am just working with some of Wiley’s ground training. I want him to get used to working off of extremely light aids. So, I have Wiley perform every movement without ever touching him. Even without touching Wiley, I still have expectations of a prompt reaction on his part.
To get Wiley to move off with absolutely no pressure, I simply slow down my aids. I move toward Wiley very slowly like I am going to touch the point on his body where the aid is. When a horse is trained well, he will start moving long before you ever touch him. As soon as he responds, give him a bridge word/click and a reward. He will start responding sooner each time. Horses are smart. They can predict what you are about to do. Play with it long enough, and you may just get a horse that will perform a movement with the smallest of aids. My previous equine partner Tucson could shake his head yes and no to answer questions just by a slight movement in my finger. Not only was it a pretty cool trick, it freaked more than a few people out when they couldn’t understand how a horse could accurately respond to their questions!
In the video, I string together a bunch of movements from Wiley’s basic ground training. He spins on his haunches, spins on his forehand, side passes, backs, Spanish walk, backs again and walks to me on command. Watch him perform each one without me having to touch him. His response is, for the most part, pretty prompt (he is only 2 1/2, so my expectations aren’t too high). He is also learning how to handle a series of requests that come fairly quickly. All of this work will eventually translate nicely into under saddle, so it is time well invested.
Most horses naturally respond to aids based on visual cues. They are constantly watching us to decipher what we are trying to say. Unfortunately, we sometimes accidentally teach them not to pay attention to us because we are so inconsistent. We move ALL over the place. Horses are much more obvious with their visual intentions. They probably wish we were too.
There are 4 fundamental visual aids you can use to put pressure on a horse and act as your “gas” pedal. They are listed (roughly) in order of the amount of pressure they put on a horse.
1: Your eyes: Are you looking directly at the horse or not? The more you are looking at the horse, the more the horse thinks your intentions are directed at him, hence more pressure. You can look directly at your horse to increase speed while lunging and look away or to the ground to decrease speed.
2: Your shoulders: Are your shoulders parallel with the horse’s body or perpendicular? When you look straight at your horse and have your shoulders parallel/facing your horse, you are adding pressure and increasing speed on the lunge line. To decrease speed, you can turn your shoulders away/perpendicular.
3. How big do you make your body? Increase speed on the lunge line by making your body seem bigger. Lift your hands higher. Put your whip in a vertical position. These are all “go” aids when lunging. Slow your horse down by lowering your whip. Lower your hands. Make yourself look smaller.
4: How close are your to your horse? Step into a horse’s personal space and you definitely increase the pressure and therefore speed while lunging. Your horse will move away at a faster pace. Step away from your horse for a downward transition.
You can play with these aids to see which aid or combination of aids causes your horse to respond the best. For Wiley, you will see me step into his personal space and lift my whip to horizontal for a trot. Step closer again and lift my arms and put my whip to vertical means canter. Downward transitions are just the reverse. I do also sprinkle in the other aids such as look down for downward transitions. I am probably not as consistent as I could be.
Notice on the downward from the trot to the walk, I ask for the downward and then immediately have to pick up my left hand slightly to put a little pressure on to get the walk. With absolutely no pressure, Wiley will just turn and walk into the center. I have to play around with the aids to understand just how much pressure or lack thereof Wiley needs for each transition. Also, just like when you are driving a car, you need a bit more gas/pressure to get up to speed. As soon as your horse reaches the desired speed, take a little pressure off to signal that the horse did the right thing. You will see during the upward transition to the canter that my arms get big until he gets the canter. Then I drop them a bit but keep my whip vertical as a reminder.
At 2 years old, Wiley doesn’t lunge for exercise. It is too hard on a young horse’s joints. He does, however, do light lunging occasionally to learn how to lunge and to improve our communication. I want him to understand my intentions….when I want more energy out of him and when I want less. I also want him to pay attention to subtle movements in my body. Wiley isn’t fully trained on visuals. He still needs a lot of “gas” to keep his attention, but he is getting better. When he is fully trained, he will be able to do all of his transitions without me having to walk into his personal space to support him. I will just stand in the middle and have him watch the whip. He will canter as long as the whip is vertical. Trot at horizontal and walk when the whip is touching the ground.
The video below shows Wiley at 2 1/2 doing some basic lunging off my body language. Notice his transitions are instant. He just needs to work on maintaining the pace without so much support. Also notice that I use voice commands. This will help Wiley transition into under saddle work.
Meet Easton. He is a confirmed tooth grinder. He has been grinding his teeth under saddle daily since he was purchased over a year ago. His owner and her trainer tried just about everything. Nothing worked.
I had a request for a “how to” on this subject so here it is….How to teach your horse to stand still without being tied. This is one of the most useful “moves” you can put on a horse. I originally trained Tucson to stand/ground tie when I was doing a lot of jumping and setting/resetting my own courses. I didn’t want to lug my horse around to the fences with me. I found that this command was useful in soooo many ways. Cross ties full? No problem. Forgot something in your tack room? Just park your horse and leave him standing. Tucson could stand while I was completely out of sight. It prompted more than one confused rider to announce “loose horse!” Continue reading “The Stand Command”→
Today is the day. I didn’t wake up thinking I’d back Wiley for the first time today, but all the planets aligned. I knew he was ready from a training standpoint. Plus, it was a warm 70 degree day right smack in the middle of winter (gotta love Southern California). Wiley had a couple of really big turnouts during the previous week, so I was confident he wouldn’t be overly excitable. And, most importantly, I had a friend with excellent riding skills that wanted to assist. When a day like this comes along, you just have to go for it!
Special Note: Wiley is only 2 1/2, so I am not planning on really riding him. Because Wiley is already so large, I am going to get him used to a rider on his back before he gets to full dinosaur size. I will putz around on him a few times and then stay off him until he is 3.
Getting Ready for the Big Day
A bit of prep work needs to happen to make sure day 1 in the saddle is as stress free as possible. Wiley has lunged lightly in the saddle a few times with no reaction. I have also worked with him a few days prior to make sure that mounting up would go smoothly. All the steps I went over with him are shown below. There is nothing earth shattering here. All of this is pretty basic stuff.
Horse’s First Day Under Saddle: Step 1
After a brief lunging session, I pulled down on the stirrup with my hand to get Wiley used to the feel of weight being put in the stirrup. I rewarded Wiley for standing quietly. I did this a few times to make sure he was good and relaxed. (Note: all the pictures actually show Amy demonstrating how I performed each step. I practiced steps 1-5 with Wiley before this day as part of the prep. All of these photos were taken the day Wiley walked with a rider on his back for the first time. When backing a horse for the first time, it is great if you have a friend to help you, but it can also be done without help. Amy is an excellent rider, so I know she will stay relaxed even if Wiley doesn’t. I stayed on the ground to handle (and comfort if needed) Wiley as he goes through this part of training.
Pulling down on the stirrup.
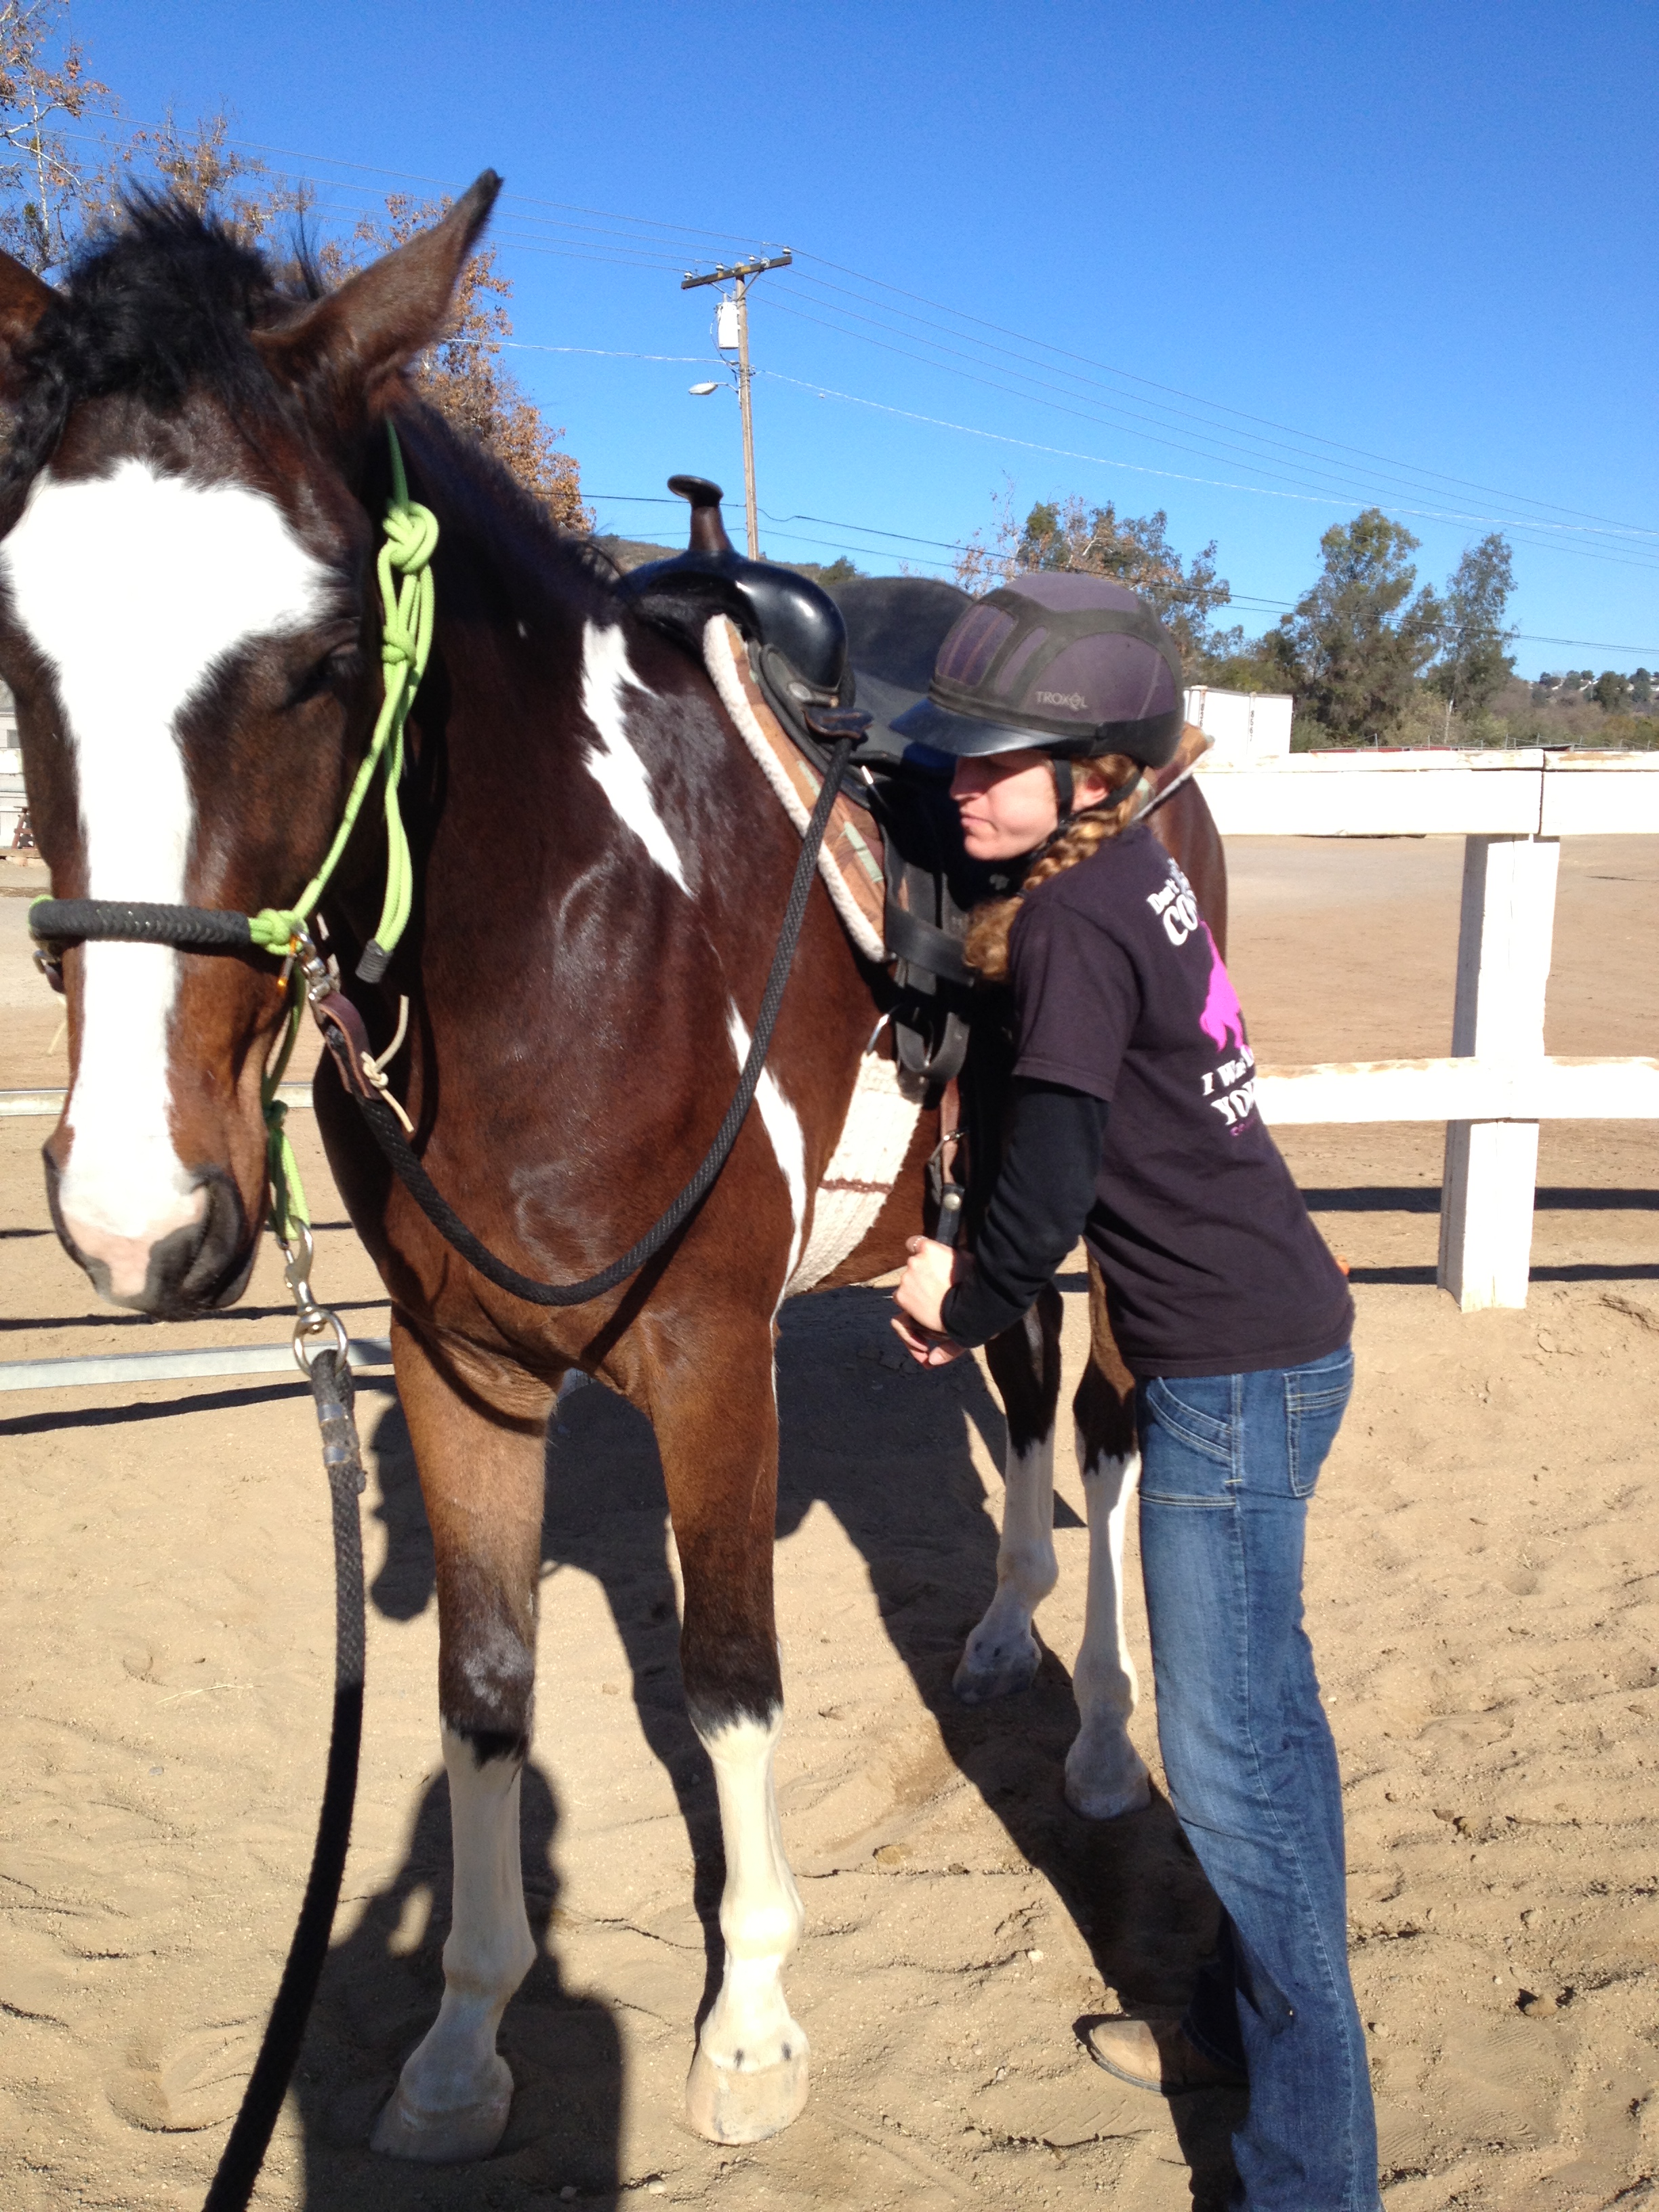
Horse’s First Day Under Saddle: Step 2
After Wiley was thoroughly bored with pulling on the stirrup, I began to put my foot in the stirrup (as Amy is doing here). I made sure my toe made contact with his belly and moved it around a bit to get Wiley used to the feeling. Let’s face it, you are going to end up bumping your toe on your horse’s side while mounting sooner or later….might as well get that over with before you do it accidentally!
Putting the toe in the stirrup and letting Wiley feel it on his belly.
Horse’s First Day Under Saddle: Step 3
Wiley is good with the foot in the stirrup, so it is time to start bouncing up and down a bit. After each bounce session, Wiley is rewarded for standing still. Wiley needs to see the movement and feel the tug on the saddle to get comfortable.
Bouncing in the stirrups.
Horse’s First Day Under Saddle: Step 4
Time to stand in the stirrup. Wiley takes a good look back, but doesn’t offer to move. Good boy!
Standing in the stirrups.
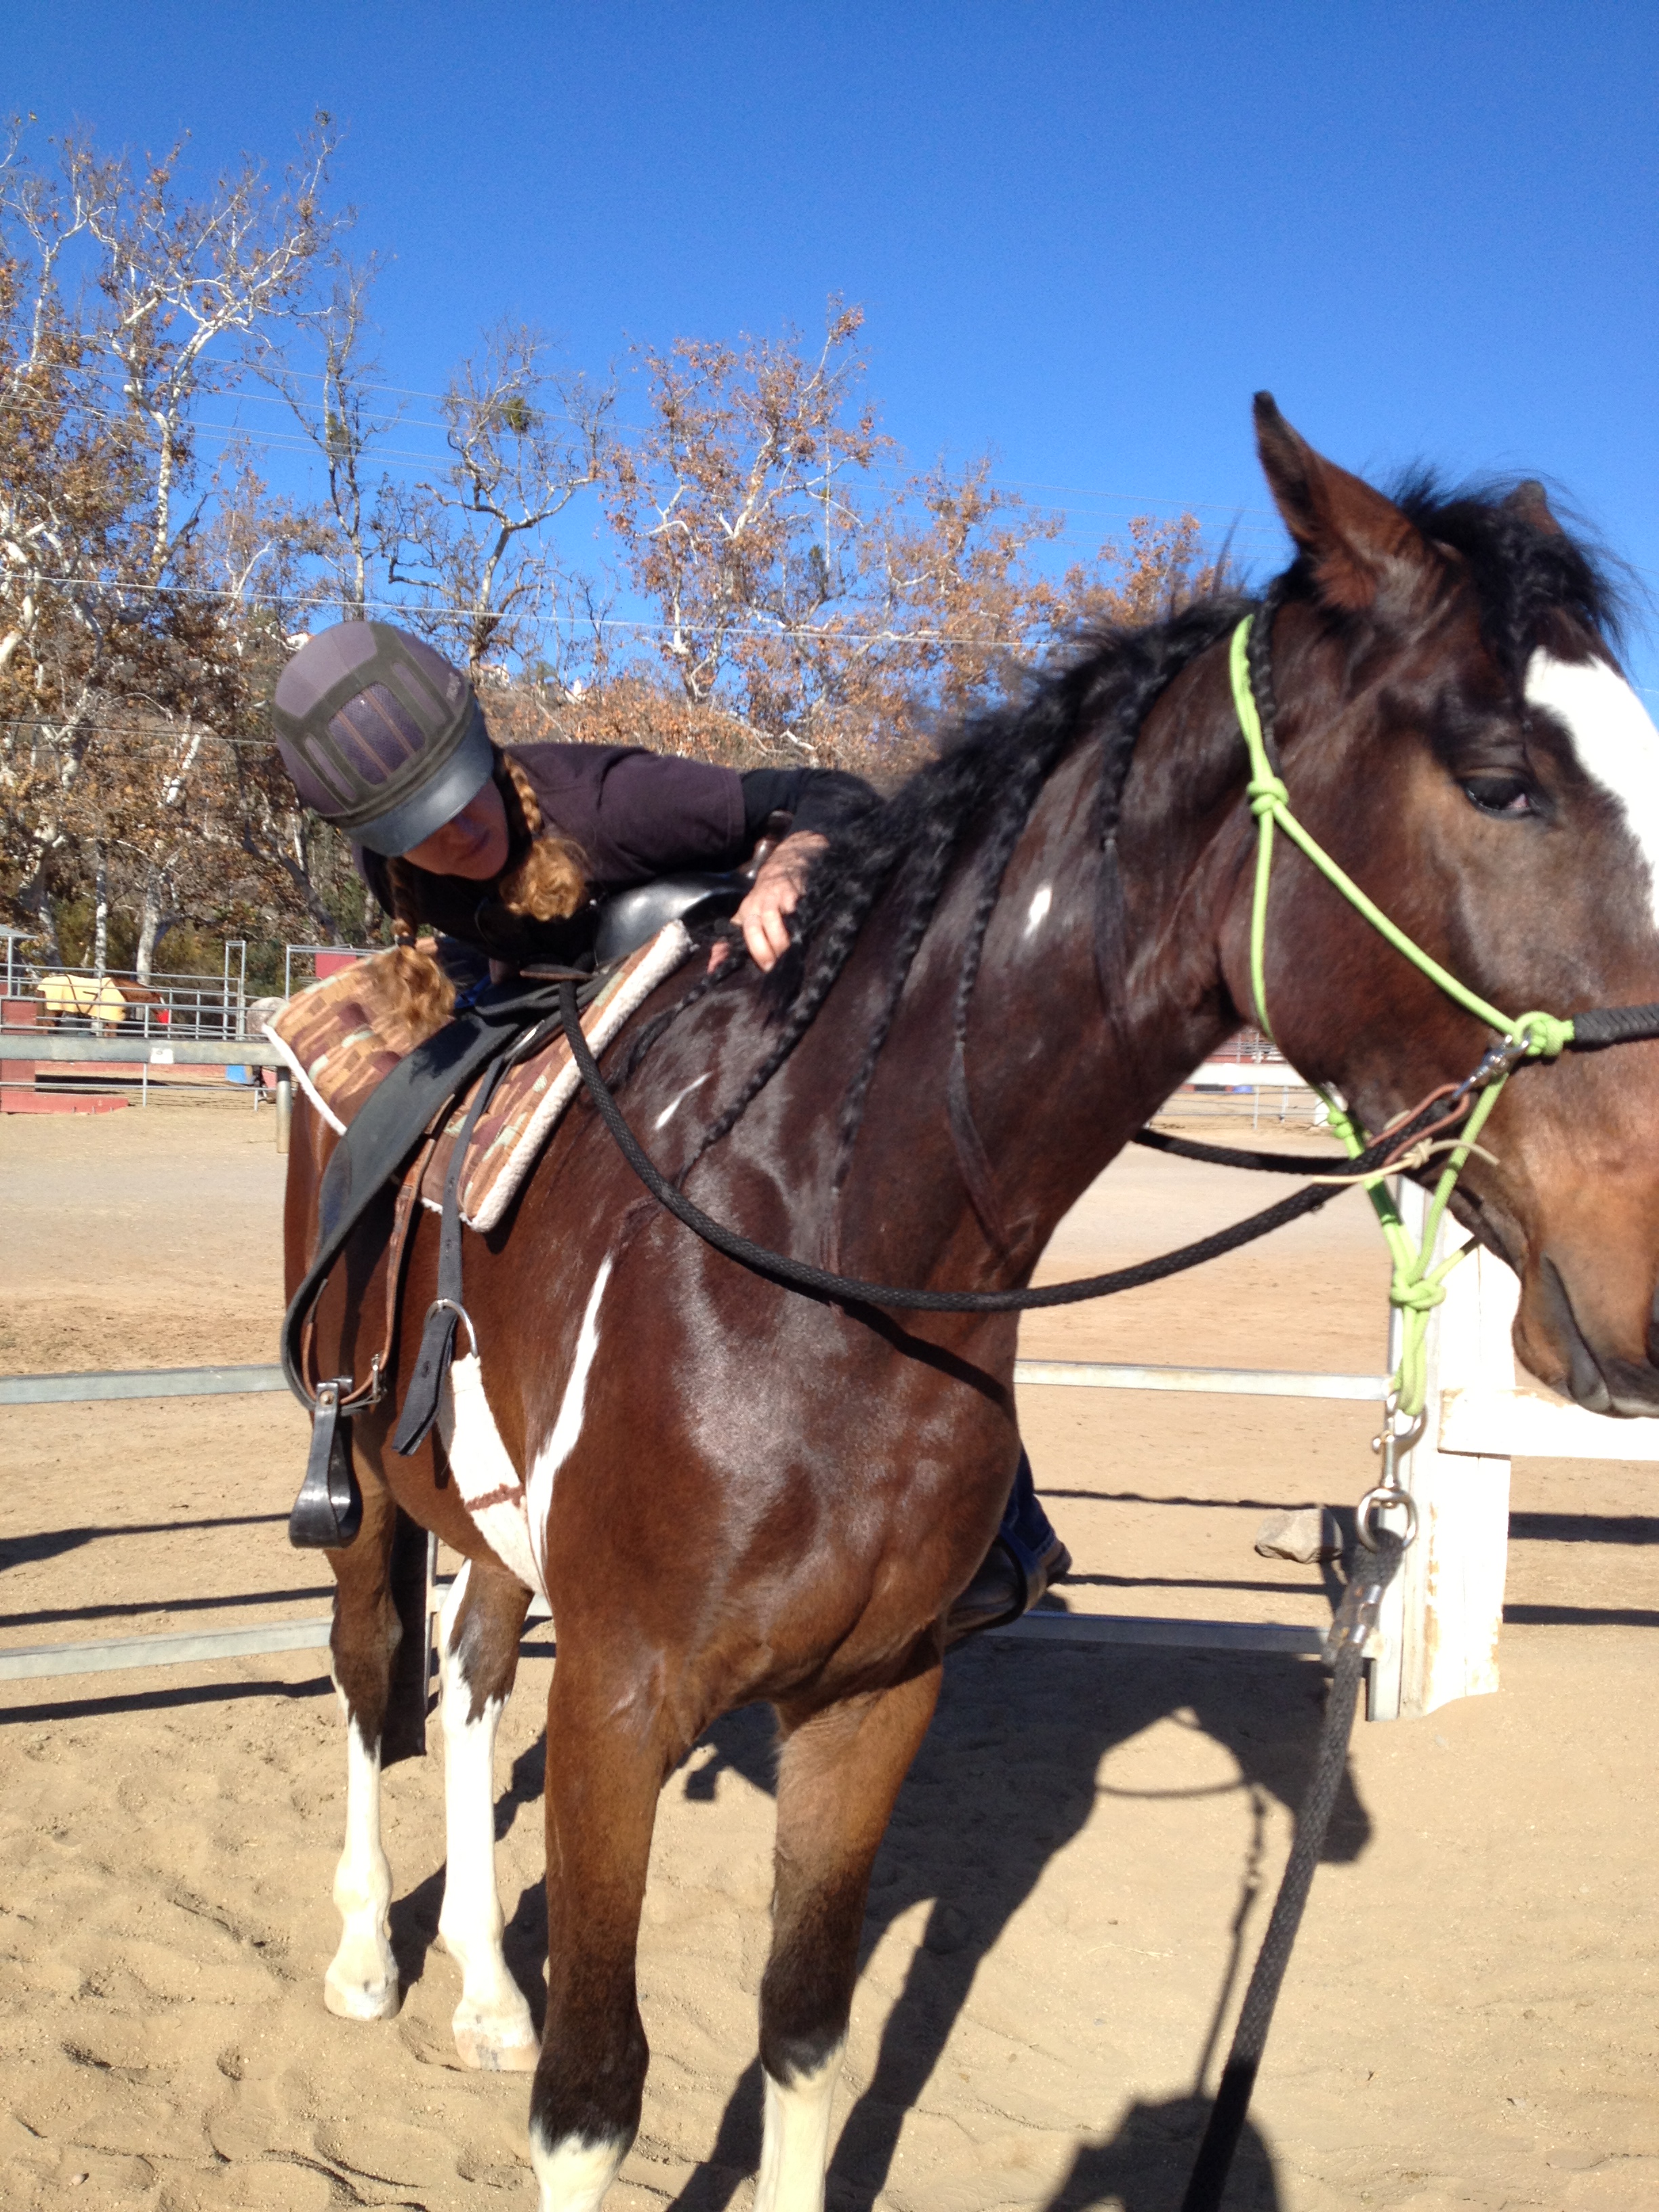
Horse’s First Day Under Saddle: Step 5
Time to put the belly on the saddle. Sometimes the horse can get nervous when he sees you cross over the middle, and Wiley did give it a good look the first time I put my belly on him. He didn’t try to move away though. I slowly started petting him on his shoulder and hind end to get him used to movement and the feeling of being touched while on him.
Amy with her belly on Wiley.
These 5 steps were repeated for a few days until Wiley was completely comfortable. I performed them on both sides, so Wiley can be mounted from either side. Now he is ready for the big day. Just because Wiley is comfortable with me performing the steps above, doesn’t always mean it carries over to another person. Horses don’t always generalize well, so Amy repeated all the steps above (and that’s how I got pix!).
Horse’s First Day Under Saddle: Step 6
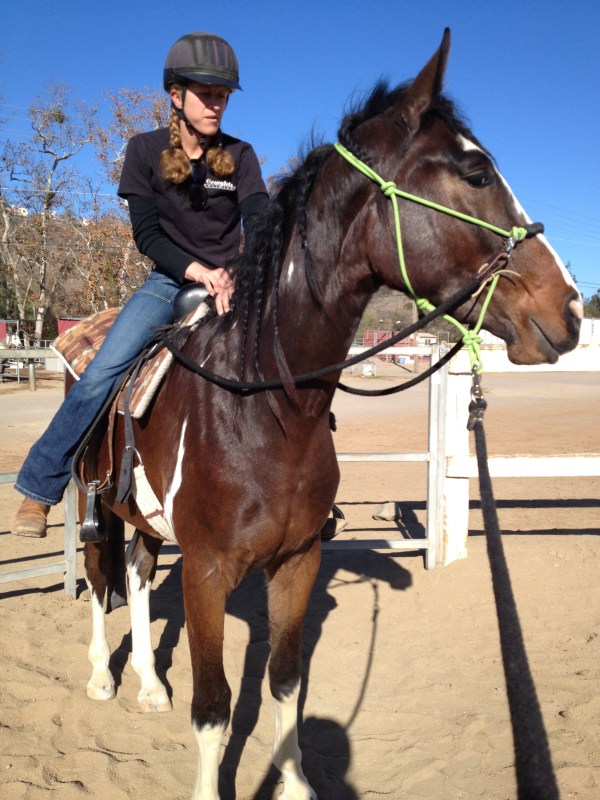
Finally time to get all the way on! Amy does this slowly but with confidence, making sure she doesn’t bump him on his rump while putting her leg over. At first, Amy maintains a low profile as she is doing here.
Staying low while giving Wiley a comforting pet.
But soon, Amy can sit up and pet Wiley. He even stops paying attention to her- a sure sign he is ready for the next step.
Wiley is showing signs he is ready to move on.
Horse’s First Day Under Saddle: Step 7
Time to move the feet. This is sometimes a strange feeling for a horse. Wiley doesn’t seem overly bothered by it…although he is going to keep an eye on Amy just in case.
Wiley was just a bit tentative at first, but it wasn’t because of the rider. Wiley was trying to figure out what I wanted him to do, so he started offering up an alternative…the maneuver we worked on yesterday seemed to be a good choice. Check out the video below for his first steps under saddle. See if you can guess what we worked on the day before.
As always, when training Wiley to do something new, the session is really short. I know Amy is going to get off Wiley’s back in a few minutes, but Wiley doesn’t know that! The session needs to be short enough that Wiley doesn’t decide it is his job to get Amy off his back. Wiley gives Amy a short pony ride and then he is done for the day. What a good boy!